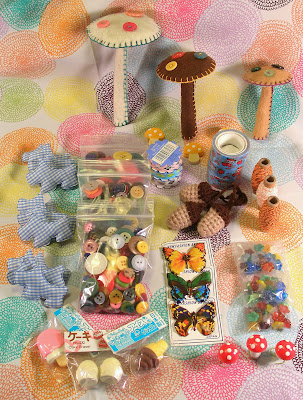
7/31/2009

And the winners are...

For the third prize basket, comment number 41, Chase!

For the second prize basket, comment number 28, Hannah!

And for the grand prize, comment number 30, Kelli!

Thanks so much to everyone for playing and leaving me all those wonderful comments all month long! Please send me your contact info at ohthecuteness@hotmail.com and I will send you your prizes on Wednesday! And congrats to the winners!

7/30/2009

I wish I could enter my own contest. Srsly.

They should call me "little miss last-minute" these days, but at least I am getting things done and not letting important deadlines pass me by. My schedule got thrown out of whack because I went to visit my parents for a little pre-birthday fun this past weekend. I had hoped to post this stuff last Wednesday and to have done a shop update on Saturday, but I had to switch days off and spent them all in Paso. Anywho, blah blah blah, let's get to the good part, yes? Here's the spread of prizes, all waiting to be arranged in the pretty little baskets I went on and on about yesterday:


Yaaay! So I have picked all these little goodies out from the most coveted parts of my stash, and made some too! We have:


Vintage Japanese tin butterfly pins, amigurumi acorns (with hanging loops), fancy little spools of baker's twine, vintage cotton mushrooms, and vintage flower beads...


Big baggies of vintage and new buttons, some Japanese dessert erasers, and some little blue plaid 3-D Scottie dog embellishments...


The little mushrooms, of course...


Japanese mushroom clips, Pandapple tape, and little spools of argyle ribbon...


Japanese stationary, fat quarters of fabric, and little Japanese craft books about felting, origami, and bead work.

Phew! Add to that the gift certificates and the little zip pouches that I couldn't photograph tonight because of a dead camera battery and you get some pretty sweet little gift baskets. I wish I could win one... But that would just be silly! You still have until tomorrow night at 9 p.m. to enter, so keep those comments coming!

7/29/2009

Crocheted Basket - Quick Mini Version


For those of you who would like to make one of the little fast baskets but don't need the entire tutorial, here is the pattern, plain and simple. This is also good to look at after you have completed the tutorial, so you can see what a pattern for in-the-round crochet looks like.

Materials:
H hook (5.0mm)
Ball of Sugar and Cream worsted weight cotton yarn in Natural
A small amount of colored yarn or hemp twine for the stripe

Abbreviations:
st - stitch
slst - slip stitch
ch - chain
dc - double crochet

Round 1: Begin with the adjustable loop in the natural yarn. Ch 2 (counts as first dc), and crochet 11 more dc into the loop. Join to beginning ch with a slst. (12 dc)
Round 2: Ch 2. 2 dc in each stitch around, join with a slst. (24 dc)
Round 3: Ch 2. *1 dc in next st, 2dc in next. Repeat from * around, join with a slst. (36 dc)
Round 4: Ch 2. *1 dc in next 2 st, 2 dc in next. Repeat from * around, join with a slst. (48 dc)
Round 5: Ch 2. *1 dc in next 3 st, 2 dc in next. Repeat from * around, join with a slst. (60 dc)
Round 6: Ch 2, *1 dc in next 4 st, 2 dc in next. Repeat from * around, join with a sl st. (72 dc)
Round 7: Ch 2, *1 dc in next 5 st, 2 dc in next. Repeat from * around, join with a sl st. (84 dc)
Rounds 8-9: Ch 2, 1 dc in each st around, join with a slst.
Round 10: Switch to accent color yarn and repeat round 9.
Rounds 11-14: Switch back to natural yarn and repeat round 9.
Bind off and weave in ends, turn down edge of basket and voila!


If you have found this or any of my other free patterns useful and would like to help me keep creating them I accept PayPal donations!

How to Crochet a Basket, Part Two.


*If you would like to make these baskets but do not need the entire tutorial,click here for the plain pattern!

So in part one we learned how to increase to make a circle, which is daunting but doable, right? If anyone has any questions at all please e-mail me at ohthecuteness@hotmail.com and I will do my best to answer and amend the tutorial in any way I need to.
Anywho... the rest of the basket is really easy because thanks to the miracles of crochet geometry, all you have to do now is do one double crochet in every stitch. Here's the breakdown:

For rounds 8 and 9, chain 2 and then do one double crochet in every stitch all the way around. Be sure NOT to do one in the base of the beginning chin this time, as we are done increasing (I have done this on accident many a time, being a space-cadet). After these two rows, you will notice that the sides are curving upward nicely and it is starting to resemble a basket more than a trivet. Of course, if you got bored already you can stop at round 7 and have a trivet, lol. In that case skip to the part about weaving in the ends.
If it doesn't seem to be curving upward, you may need to tear some stitches out and re-do them tighter. Also, be sure to count and make sure you still have only 84 stitches.

And now for the fun part... We are going to switch colors and make a little stripe in the center of the side of the basket:


After you have done your accent yarn stripe for round 10, you will want to use the natural yarn to crochet 4 more rows, one double crochet per stitch. Join the round like all the others, and that's it! Now all you have to do is weave in the very last end and fold the edge of the basket over!

Here is how to weave in that last end (this is a small-scale demonstration, lol):


Grab the short end of the yarn and pull it through the loop. It really doesn't matter which loops you use to weave in, just make sure they are tight ones so they secure the tail.


Well there you go! Hopefully you should have a nice little handmade basket to store some crafty bits and bobs in now! If you would like to make a set of nesting baskets, for a smaller one only increase to round 5 in part one, then and just crochet one double crochet around for the rest of the rows. And for a bigger one, use the standard increase pattern I showed you in part one and add two more increase rows, then finish it as usual!

And now, just for fun, I will share probably the most mundane-yet-useful-thing I ever learned during my employment at ArtFibers: the weaver's knot.

Most people try to tie two pieces of string together with a granny knot or a square knot (kind of like the knot you start with when you tie your shoe), but it won't stay in the long term. This knot works on even the most slippery fibers. I admit I didn't know about this for the first 20-ish years of my life, and I don't know how I got along without it.
If you want to use scraps of yarn and tie them all together to make a super-colorful and eco-friendly basket (since the scraps would probably otherwise go in the trash), use this know to tie the yarn bits together or they may not stay if they are different weights.


Just encase those ends as you go and no one will see the knot!

Alrighty then, I think I have imparted enough wisdom for today, lol. That took waaaaay longer than I thought it would, but if it helps even one person to learn to crochet then it was all worth it. See you tomorrow with pics of the big prizes for the blogiversary giveaway! You still have until 9 p.m. pacific time on the 31st to post a comment and be entered for your chance to win!


If you have found this or any of my other free patterns useful and would like to help me keep creating them I accept PayPal donations!

How to Crochet a Basket, Part One.

I have finished everything for the gift baskets, which I will post pictures of tomorrow. First thing, the baskets themselves:


And, as promised, here is my tutorial. This pattern is a quick version of my Kitty Stuff Basket pattern. I made this tutorial for beginners who have a little experience with regular crochet and would like to learn to crochet in the round to make things like this basket, or hats, or amigurumi. This is the way I do it, and since I am self-taught with a little help from my mom and the Internet, I am sure it is a slightly unorthodox way to do it, but if it works for me it might work for others out there who have trouble with traditional methods. This is also how I get seamless rounds. Can you find the join? Actually, I forget where it is too! So let's get started, shall we?


*If you would like to make these baskets but do not need the entire tutorial, click here for the plain pattern!

Materials you will need:
An H hook (5.0mm)
A ball of Sugar and Cream worsted weight cotton yarn in Natural
A small amount of colored yarn or hemp twine for the stripe
Scissors
A tiny crochet hook for weaving in the ends

1. First, with the natural cotton yarn, we will make an adjustable loop for the base. A lot of traditional crochet books tell you to make a chain of 4-6 stitches and then crochet into the loop. This method leaves you with a big hole in the center of whatever you're making, and I hate that. The adjustable loop usually takes a couple tries to get it right but when you do you will be so much happier! Here's how we do it:

Lay the short end over two fingers, like this:


Ta-da! This is the magical adjustable ring that will open up a whole world of hats without pom-poms on top to cover up the hole left by the old method! And amigurumis will keep their stuffing in without any extra sewing! *Dreamy sigh.*

2. Now, we will crochet into the loop:

First, chain 2 as you would in normal crochet. We will be working the entire basket in double crochet, so a knowledge of that stitch is essential.


See, it looks good, right? I get a lot of people asking me how I get my crochet so tight. It's no big secret... First of all, I always keep a pretty tight grip on my long end of yarn, which increases the tension (and incidentally has given me some nice callouses on the insides of my knuckles). When I am making an amigurumi, it is usually all in single crochet, and all I do to tighten it is give the long end of the yarn a good yank when I finish each stitch. This cinches everything up tight. With double crochet, I tug after every time I pull the yarn through 2 loops on my hook, so basically I tug once in the middle of the stitch and once when the stitch is done. That's all it takes. So if your crochet is turning out floppy and loopy, just pull!

Anywho, now that you know how to do a double crochet tightly into the round, do it over and over again until you have 12 altogether (11 plus the initial chain 2). Feel free to squish the stitches to the left as you work, keeps things tidy.


Some Japanese craft books have you work in a continuous spiral instead of joining rounds, but this usually works best for single crochet only and for things that don't need a nice straight edge like this basket, so we will be joining the rounds here.


If you know your way around crochet, you will see that the edge of the round looks just like the top edge of straight crochet, with the familiar V-shaped stitches going around:


At this point, this is what your round should look like. Count backwards from the hook to make sure you have 12 stitches. Remember that the loop on the hook never counts as a stitch, but the V it is coming out of does.


I have to say that I absolutely HATE weaving in ends. So I just eliminate them as I go by encasing them in 4-6 stitches and then trimming the excess. That way the only finishing the project needs is to have the very last end woven in. I have to do this or I might not finish anything!

3. So now, onto round 2:

*Here's a note about this chain 2: most traditional crochet instructions tell you to count the chain 2 as the very first stitch in the round, but I find that this messes up my counting and I tend to leave something out. So I prefer to think of that chain as the LAST stitch in the round. Don't count the chain when you start any of the rounds after the first one. Trust me, it will help. So after the chain 2, when you insert your hook into the first stitch and make your first double crochet, count it as number one...


To make the bottom of your basket a flat round, you have to increase the number of stitches in every row by 12. And these have to be evenly spread out or it will be lopsided. There is a very standard and easy way to do this, and here's how you start:


This counts as stitch number two in this round. You will be doing 2 double crochet stitches in every stitch in this round.

*Here's a detail of the short end being encased by your stitch. Notice that when you wrap the long end over the hook to complete the stitch, the short end remains inside the bottom of the stitch. Sounds complicated, but try it and you will see what I mean. The encasing method works great for multi-colored granny squares as well, because you will drive yourself nuts trying to weave in all those ends!


So, if you counted correctly, you should have a nice flat round of 23 stitches, and then this is how you close up the round:


So, if you counted correctly and did that last stitch in the right place, when you count backwards from your hook you should have 24 stitches, which is the original 12 from the first round, plus 12.


4. Now you know enough to finish the bottom of your basket:

For round 3, chain 2 just as before (counts as the LAST stitch in the round), but instead of doing 2 double crochets in every stitch, you do ONE double crochet in the first stitch of the round, THEN you do 2 in the same stitch. This spreads out your increases and your basket will be nice and even. So you make your way around round 3, increasing in EVERY OTHER stitch. Be sure to do the last increase in the base of the initial chain 2, and join the round just as before. Hopefully, when you count your stitches, you should have 36 (the 24 from the last round, plus the 12 you added by increasing).

For round 4, chain 2 and then do ONE double crochet in the first AND second stitches of the round, THEN do two double crochets in the same stitch. Repeat this stitch pattern all the way to the end of the round, then finish it just like the rest, ending up with 48 stitches.

By now, you should start seeing a pattern in the way you are spreading out your increases. For round 5, you would do one double crochet in the first THREE stitches of the round, then do two in the same stitch, and repeat that pattern around until you finish the round and end up with 60 stitches.

For round 6, chain 2 and then do ONE double crochet in the first four stitches, THEN do two double crochets in the same stitch. Repeat this stitch pattern all the way to the end of the round, then finish it just like the rest, ending up with 72 stitches.

For round 7, chain 2 and then do ONE double crochet in the first five stitches, THEN do two double crochets in the same stitch. Repeat this stitch pattern all the way to the end of the round, then finish it just like the rest, ending up with 84 stitches.

*Interesting, though not very important note... Notice that the round number multiplied by 12 gives you the number of stitches in the round? Round 1 x 12 = 12, round 2 x 12 = 24, etc. Also, the round number tells you the number of stitches in the increase pattern: round one, there's only one stitch all the way around. Round 2, there's 2 sitches together that make the increases. Round 3, there's one alone and then 2 together for a total of 3 stitches in the pattern you repeat around. Round 4, there's 2 alone and then 2 together for a total of 4, etc. Confused you yet? I promise that the more you do it, the easier it gets to remember the pattern and the rhythm of the stitches.

Anywho, now you're done with increasing! You should have a nice, big, flat circle. If it doesn't lay perfectly flat and has a bit of a ripple, worry not! You just need to try pulling it tighter next time, but this time around it will get mostly smoothed out as you make the sides of the basket, and after a bit of use (i.e. putting stuff in it), the bottom will flatten out. If it really bugs you or you are making it for a gift, you can always block it when it's all done by getting it damp and putting it over something like a tupperware to help it keep its shape. Let it air dry and voila!

So this is the end of part one, and you can click here to go to part two!


If you have found this or any of my other free patterns useful and would like to help me keep creating them I accept PayPal donations!